
Markers
|
Available in VoceVista Pro
Markers are only available in VoceVista Pro. |
Markers enable you to bookmark sections within files and label them. This makes it easy to:
-
mark and find sections of long recordings
-
organize large collections of recordings by using labels and point markers
-
move quickly to marked sections within a recording
-
analyze and compare marked sections in a recording
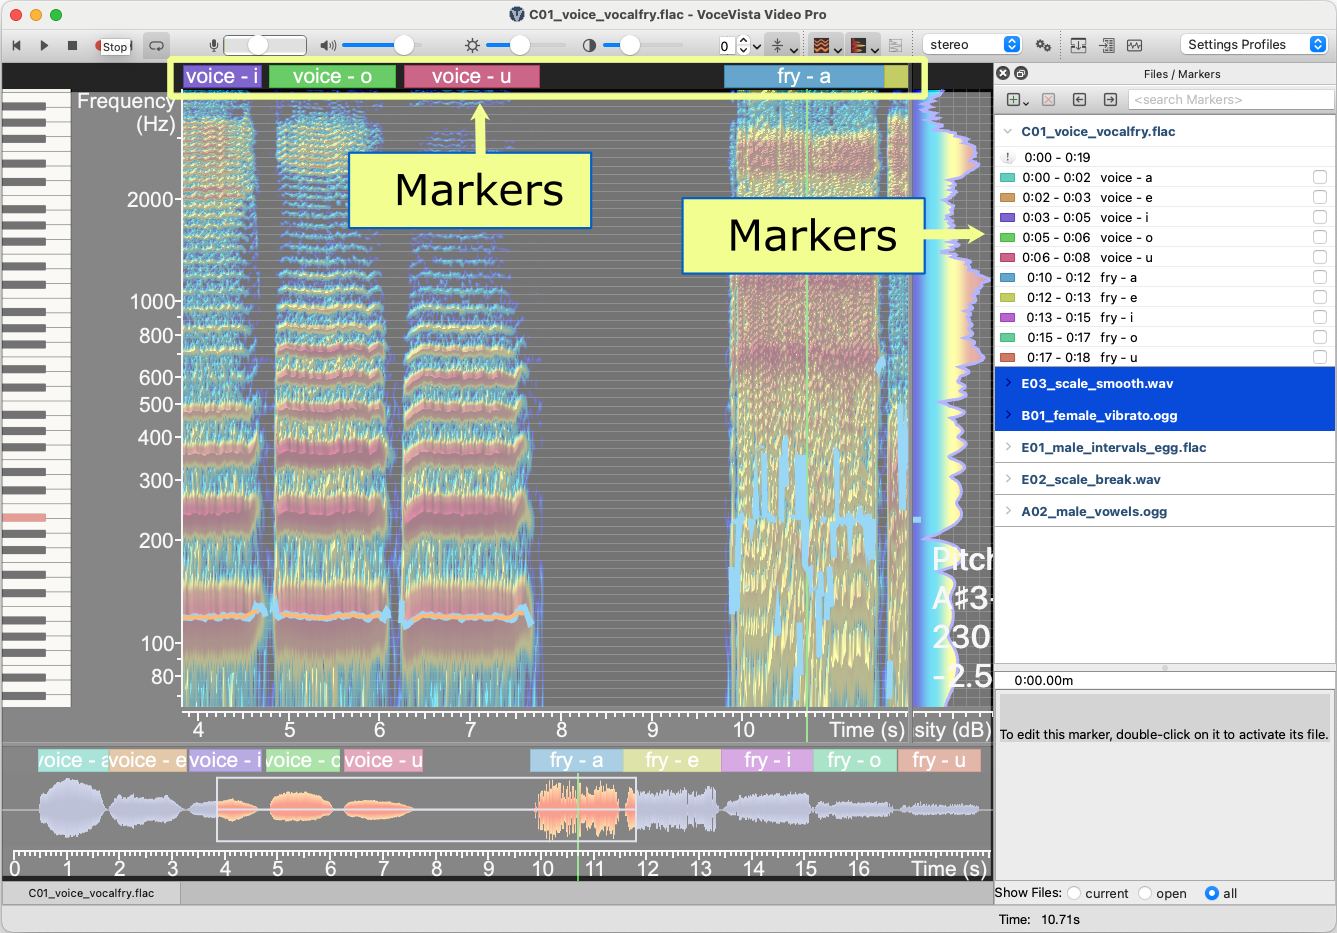
A recording with markers is an example of a recording with markers that have been added and labelled to identify different sections within the file. The labels appear above the spectrogram and in the Files / Markers list on the right side of the user interface. This list of markers lets you easily see the contents of the recording and quickly move to that section, as well as analyze and compare marked sections in a recording.
Marker Types
 File Description
The application automatically adds a File Description marker to every recording. You can use it to add any information about the recording. This marker always appears first in the marker list of a file, and it has the icon.
To add information to this marker, select it in the Files/Markers list, and then enter text in the box that appears below the list of markers.
 Auto Markers
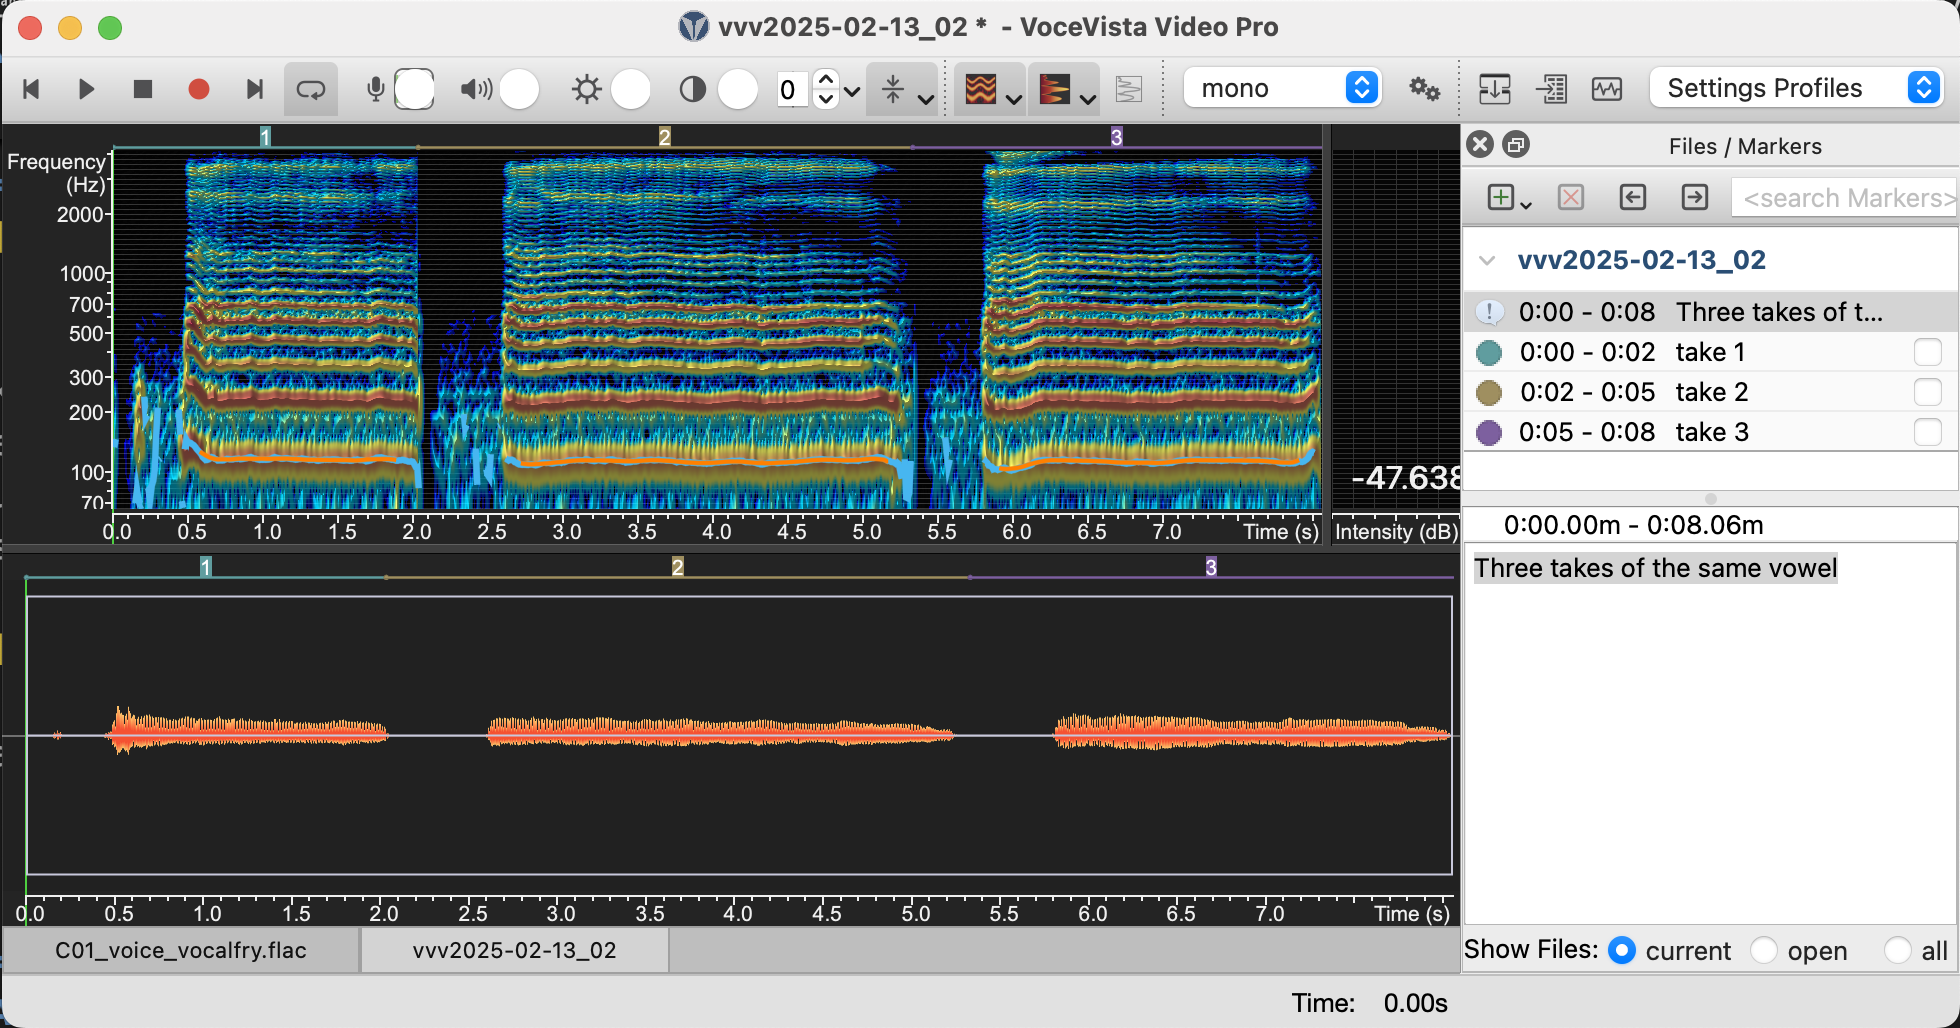
An Auto Marker is created every time you press record, record for a while, and then press stop.
Auto Markers have a circle icon on the Marker List. Each segment is called a “take,” and takes are numbered. You can change the take descriptions later by selecting them and editing the text that appears in the box below the list of markers (see below).
By default, 0.5 seconds of silence are added after each take. You can change this value in the Advanced Settings.
 Range Markers
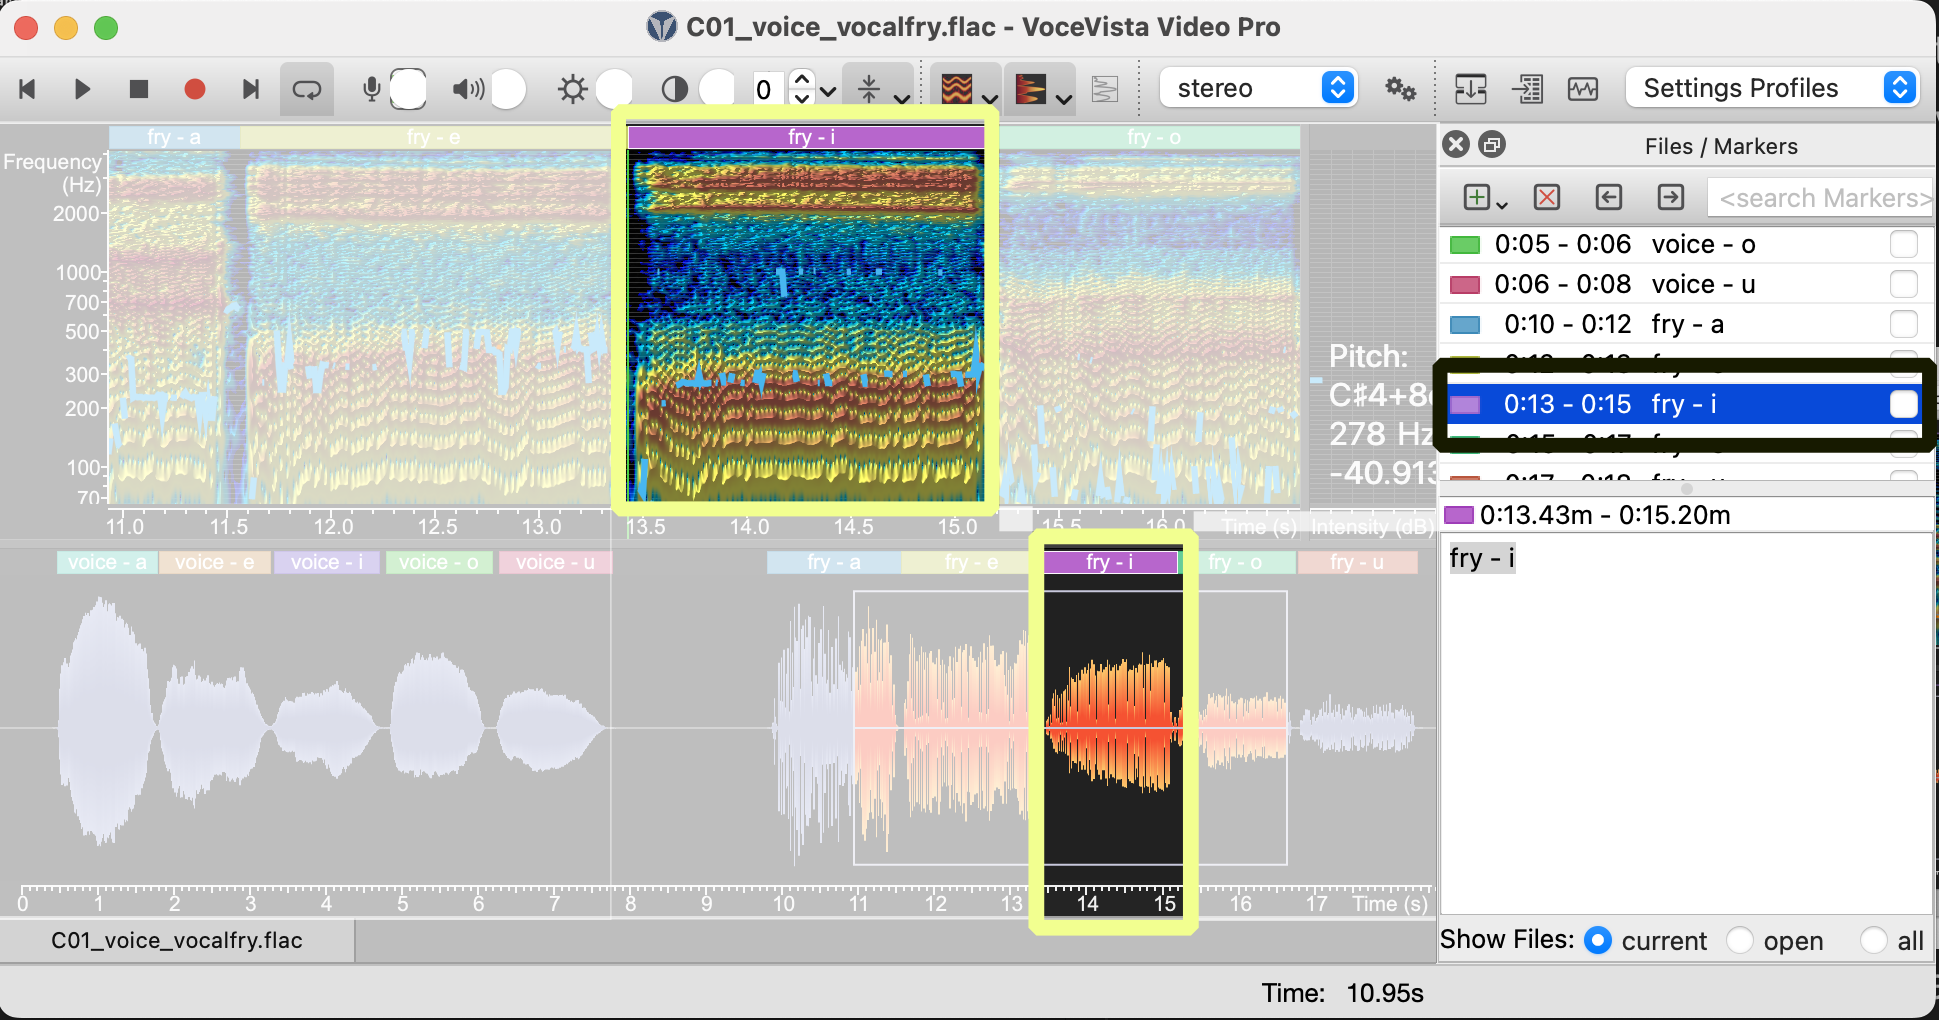
You can add Range Markers to identify sections within a file. This can be useful when you have a long recording and want to be able to easily find that section later. You can also move easily between sections you have marked by selecting them in the Marker List or compare sections by checking their associated boxes in the Marker List.
To add a new Range Marker, select a time period, and
then click . Range Markers appear with a rectangular icon on the Marker List. The marked section also has a rectangle that appears above the signal in the spectrogram and waveform that matches the Range Marker color and description.
 Point Markers
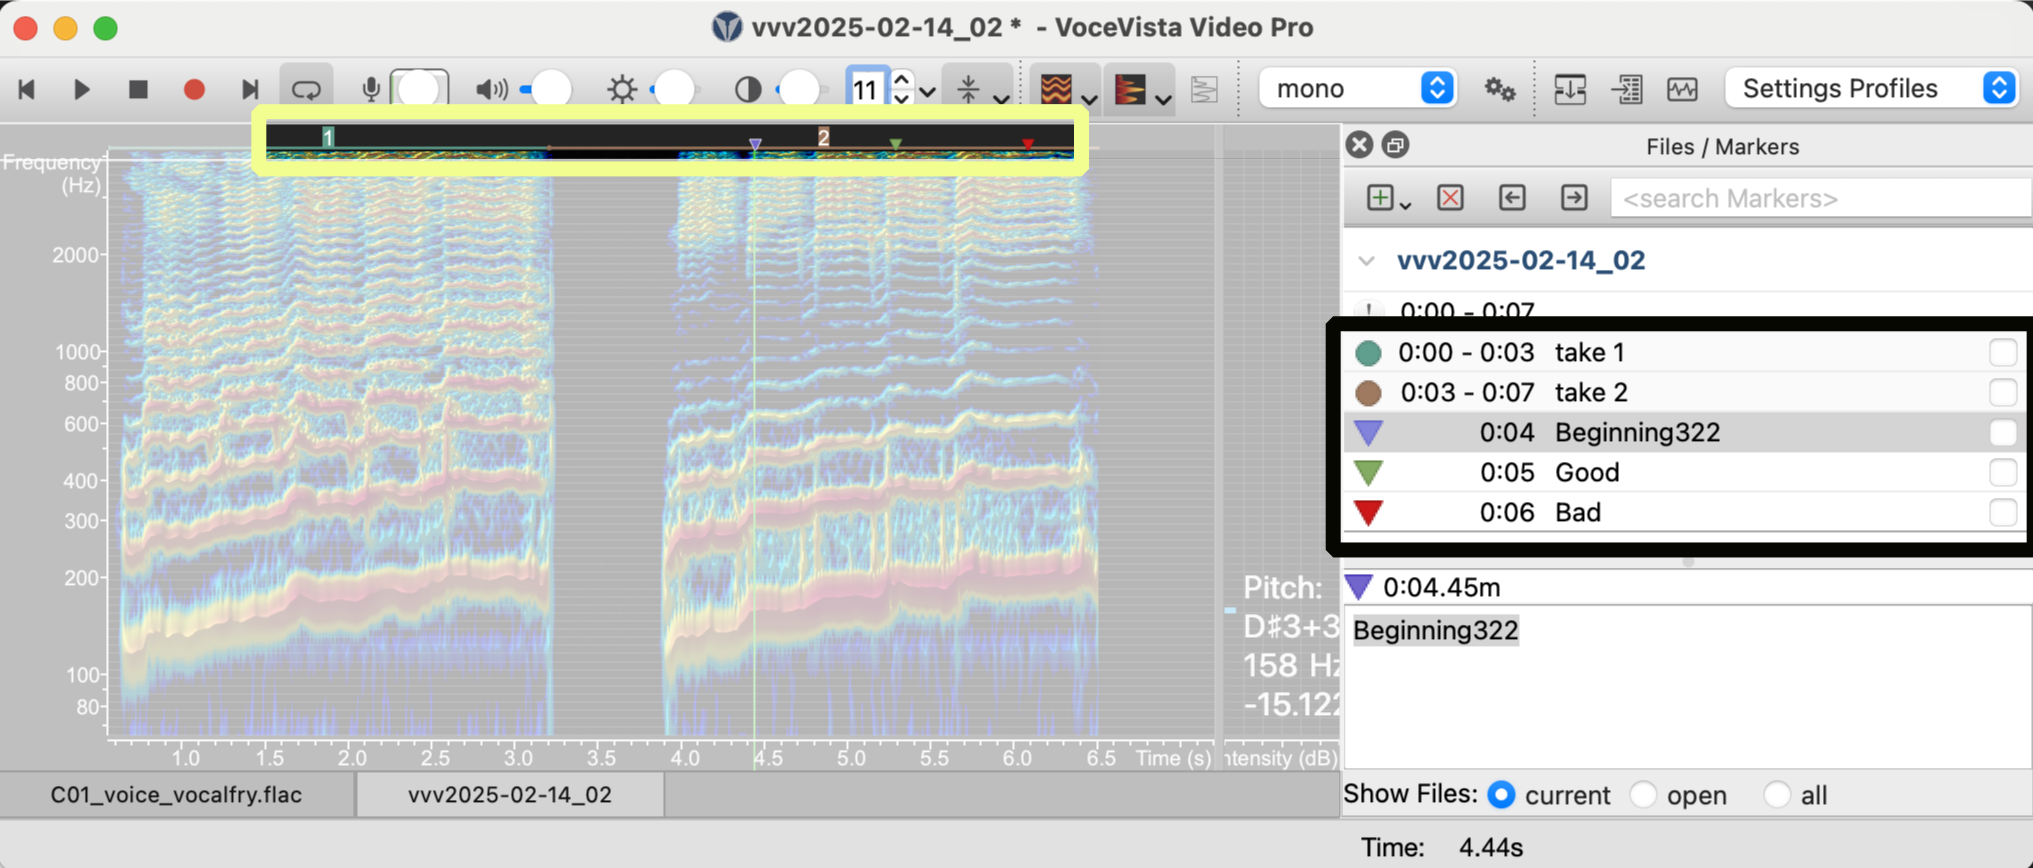
Use Point Markers to mark a point in time in a recording. To add a new point marker, click the Timeline or Spectrogram to position the Time Cursor and reset the selection. Then click (or right-click the Spectrogram and select Marker ).
Standard Point Markers have the blue triangle icon. They can also have the “Thumb up” (green) or “Thumb down” (red) icon. There is no difference between the Thumb Markers and regular Point Markers except for the icon.
Navigating with Markers
Markers make it easy to move between marked sections of a recording.
You can move to the next or previous marker through the menu. Click or Jump to next marker. You can also use the Q and W keys instead. If you press Shift+Q or Shift+W, you jump to the previous or next marker and zoom to it, so that the entire time range of the marker is visible and selected.
You can also click any marker in the Marker List to jump to it, or double-click it to select its time range and zoom to it.
Editing Markers
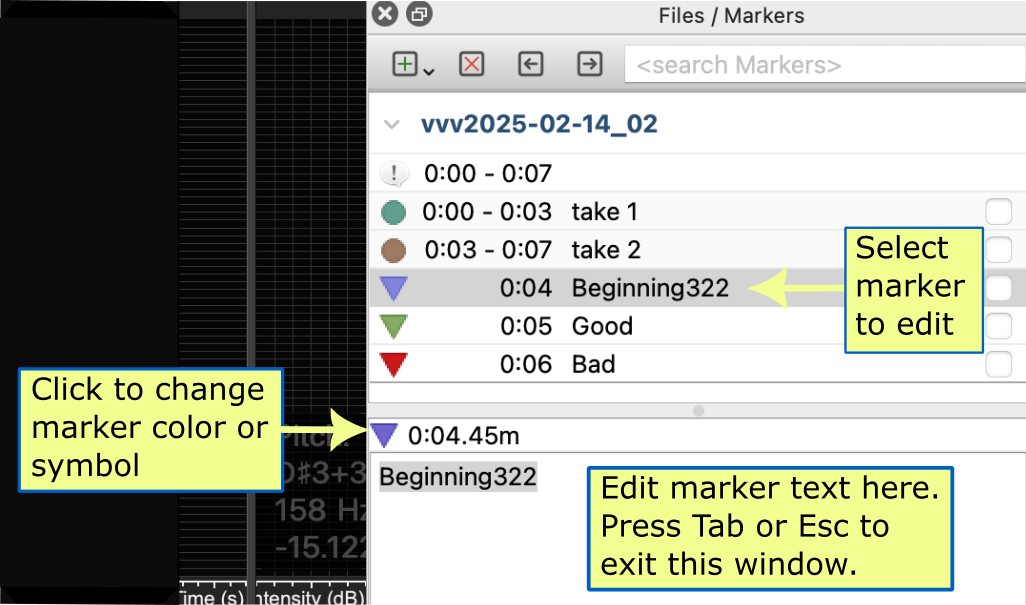
You can edit the text and color of a marker in the lower half of the File / Marker list. If this window is not visible, click .
To change the time range of a marker:
-
Click and drag the marker label that appears in the Spectrogram or Timeline and then double-click the marker label
-
Click and drag the edges of a Range Marker to your (then click and drag the marker label to match)
Setting Marker Visibility
You can toggle the visibility of individual marker types by selecting one of the Show auto/point/range markers or Hide markers commands from the Markers menu.
Searching Markers and Files
To search for file names and marker text, enter a term into the <search Markers> box at the top right corner of the Files / Markers list.
There are three radio buttons at the bottom of the Files / Markers list that enable you to search:
-
the current file
-
all open files
-
all application files on your local hard drive