
Export Screenshots
In VoceVista, you can take screenshots from any part of the user interface and save them as image files.
Click to open the Export Screenshot dialog box. The following screen appears.
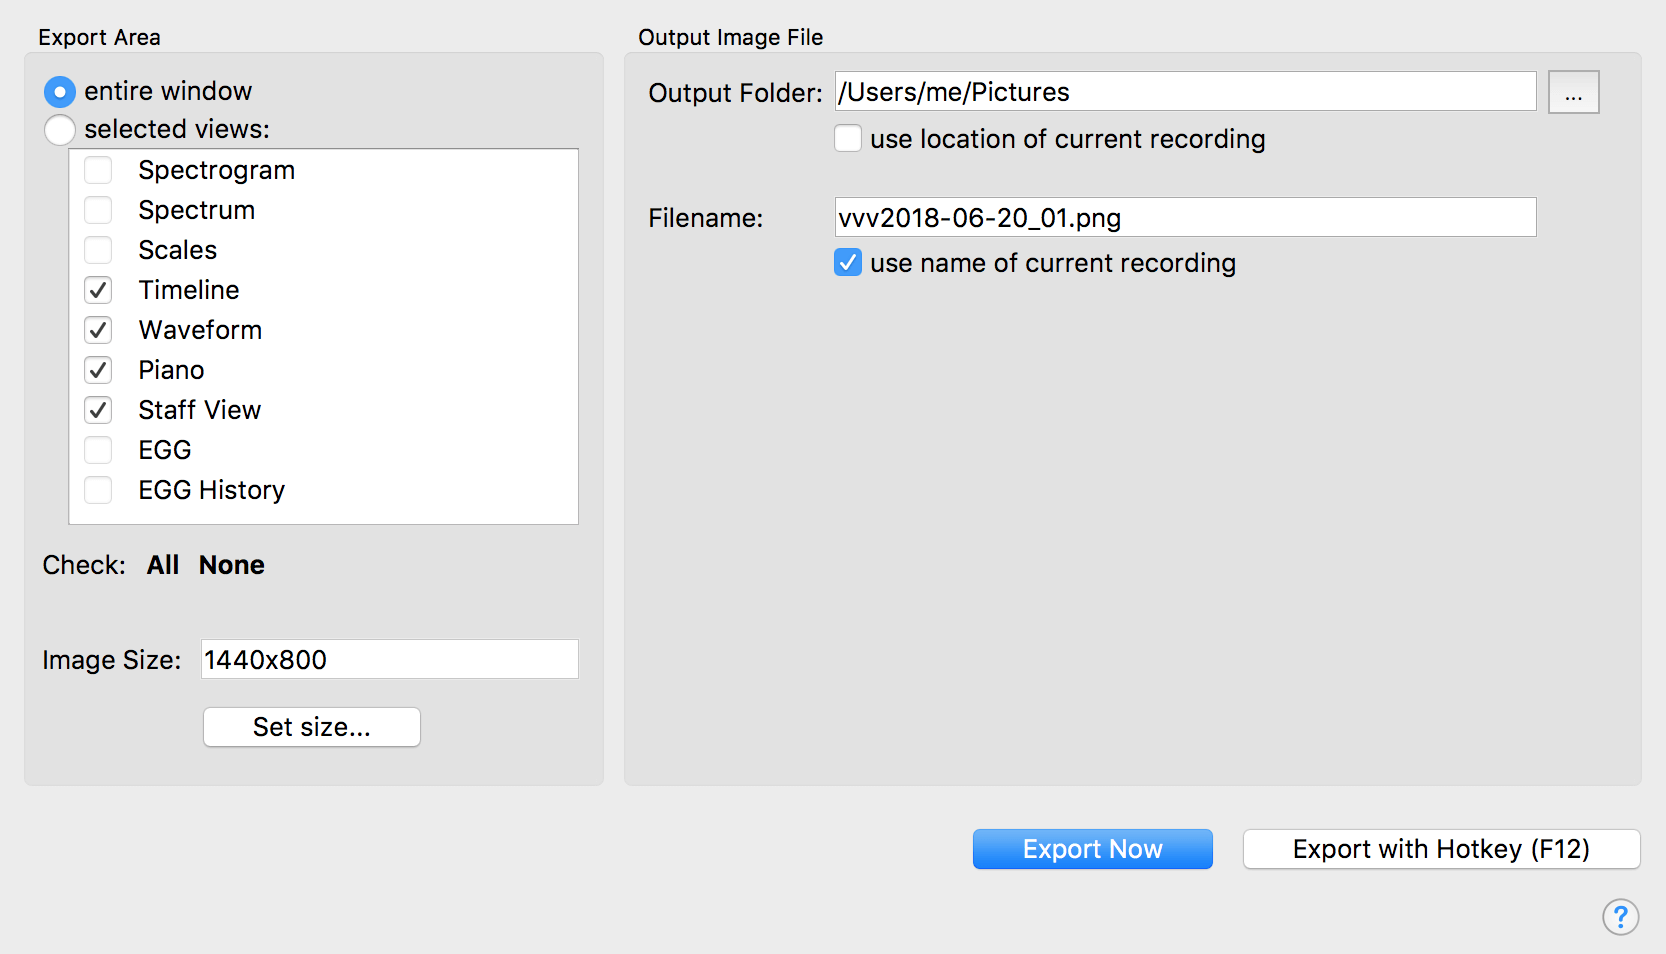
This window has two main sections. On the left side in the Export Area section, you specify whether to take a screenshot of the whole application window or just some of the views in the user interface, and on the right side in the Output Images section, you specify the location where you want to save the graphic and the filename for the resulting image.
Export Area
In this section, select entire window to take a screenshot of the VoceVista window, or select selected views and then check any of the views that appear below this option. Only those views you select appear in the screenshot. VoceVista exports the smallest rectangle that includes all selected views, so in some cases other views may be included. As you select views, a transparent colored box appears in the application over the views that will appear in the resulting screenshot.
| Only selected views that are currently visible in the application window will appear in the screenshot. |
Output Image File
This section enables you to specify where to save the exported screenshot and its filename.
Output Folder
The path to the location where the screenshot will be saved appears in this field. Click the three dots to the right of the field to browse to a different location. Check use location of current recording to save the screenshot in the same folder as the recording.
File Name
The file name for the exported screenshot appears in this field. You can edit the file name directly, or click the three dots that appear to the right of the field to enter the file name and path for the exported screenshot. Check use name of current recording to save the screenshot in the same folder as the recording.
| If you save multiple screenshots, the application appends a number to the file name so that each is unique. VoceVista will not overwrite existing files. |
Export with Hotkey
If you want to save your current settings and bypass the Export Screenshot dialog box every time you want to save a screenshot, click Export with Hotkey. Now, every time you press F12 (configurable through Keyboard Shortcuts on the Settings dialog), the application creates a screenshot using the saved settings.
| After you click Export with Hotkey, you have the option to check the include mouse cursor option so that the mouse cursor appears in screenshots that you create using the hotkey. This can be helpful when you are highlighting information in the application. |